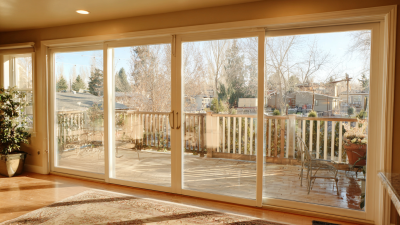
How to Replace a Sliding Glass Door?

Replacing a sliding glass door can transform a dim, drafty room into a brighter and more comfortable living space. However, the project requires more than removing an old panel and installing a new one. Accurate measurements, safe glass handling, weatherproof sealing, and proper track alignment all affect the final result.

This guide explains sliding glass door replacement through practical, experience-based steps. You will learn how to inspect the frame, choose a compatible door, prepare the opening, and test smooth operation. Small details matter. A gap of only a few millimeters can allow water, wind, or insects inside. The wrong roller size may also make the door difficult to move.

Safety comes first.

Wear gloves and eye protection when handling glass. Ask another adult to help lift heavy panels, and stop if the frame shows rot, structural damage, or hidden moisture. Local building requirements and the manufacturer’s instructions should guide the installation. Professional help may be the wiser choice when the opening is damaged or the glass is unusually large.

Even careful homeowners make mistakes. I have seen projects fail because measurements were taken from the old door instead of the actual opening. That detail deserves a second check. With patient preparation and realistic expectations, a replacement can improve insulation, security, ventilation, and everyday comfort without unnecessary complications.

How to Replace a Sliding Glass Door?

Assess the Door Opening and Choose a Suitable Replacement

How to Replace a Sliding Glass Door?

Assessing the existing opening is the most important step before choosing a replacement. Measure the width at the top, middle, and bottom. Measure height at both sides and the center. Record the smallest dimensions, not the most convenient ones. Check the diagonals too. If they differ noticeably, the opening may be out of square. A new door can look perfect in the showroom but bind against an uneven frame.

Inspect the sill, jambs, subfloor, and surrounding drywall for swelling, rot, cracks, or water stains. A soft sill is not a minor detail. It may indicate hidden moisture damage. Remove interior trim carefully, because the actual rough opening may differ from the visible frame. Confirm the wall thickness, exterior cladding, drainage path, and available clearance for the operating panel. Do not order from one measurement.

Energy performance also deserves attention. The U.S. Department of Energy reports that windows account for roughly 25–30% of residential heating and cooling energy use. For a glass door, compare the U-factor and solar heat gain coefficient shown on its performance label. Lower U-factor usually means better insulation, while SHGC should match the local climate and sun exposure. The National Fenestration Rating Council explains these ratings through standardized testing. That makes comparisons more reliable.

A practical warning: replacement openings are rarely perfect. I recheck every dimension after removing the old frame. It feels repetitive, but a small mistake can create expensive gaps, leaks, or difficult operation.

Gather Tools, Materials, and Safety Equipment

Replacing a sliding glass door begins with preparation, not removal. Measure the opening at three points for width and height. Record the smallest measurements. A practical mistake is trusting one measurement; older frames can shift several millimeters. Prepare a tape measure, level, drill, screwdrivers, pry bar, utility knife, shims, exterior-grade sealant, flashing tape, replacement rollers, and corrosion-resistant screws. Keep a vacuum nearby for tiny glass fragments.

Safety equipment deserves equal attention. Wear cut-resistant gloves, safety glasses meeting ANSI Z87.1, long sleeves, and sturdy footwear. Use two people to carry the glass panel. The U.S. Department of Energy reports that windows can account for 25–30% of household heating and cooling energy use, so a poor seal can affect comfort and energy bills. Check the new door’s U-factor and solar heat gain coefficient through National Fenestration Rating Council information. Lower U-factor generally means better insulation, but local climate still matters.

Tips: Clear furniture before work. Protect the floor with thick cardboard. Never rest glass directly on concrete. Support the panel vertically, not flat. Photograph the original hardware before removal. If the frame feels stuck, stop and inspect hidden screws instead of forcing it. I once overlooked a buried fastener, and the trim cracked during removal. That error was avoidable. Test the rollers, latch, drainage holes, and weather seal before applying final sealant. Small gaps are easy to miss.

Remove the Existing Sliding Glass Door Carefully

Removing a sliding glass door safely starts with controlling its weight, not pulling harder.

Glass panels can weigh more than expected and may shatter if twisted. Wear cut-resistant gloves, safety glasses, and sturdy shoes before touching the frame. Protect the floor. Keep children and pets away.

Remove the screen door first, then unlock the glass panel. Look along the bottom edge for roller adjustment screws. Turn them slowly to lower the rollers and create clearance.

With another adult supporting the panel, lift the bottom edge into the top track and tilt the panel inward. Keep your fingers away from the corners. Move slowly.

Do not force a stuck panel.

Many doors also have a fixed glass panel secured by screws, clips, or a center stop. Remove these fasteners only after supporting the panel firmly. A loose panel can shift without warning.

Cut old sealant carefully with a utility knife, but keep the blade pointed away from your hands. Never strike the glass to make removal easier. Tempered glass can break suddenly into small pieces.

If the frame is corroded or the panel feels unstable, stop and seek help from a qualified installer.

A common mistake is removing hardware before understanding how the panel is supported. I have seen this turn a simple replacement into floor damage and broken trim.

Photograph each fastener and note its position before taking anything apart. Mistakes happen when attention slips.

Install and Adjust the New Sliding Glass Door

How to Replace a Sliding Glass Door?

Installing a new sliding glass door starts with accurate opening measurements. Measure width at the top, middle, and bottom. Use the smallest measurement. Check the sill for rot, cracks, or soft wood. A clean, level base prevents costly adjustments later.

The U.S. Department of Energy reports that windows can cause 25–30% of household heating and cooling energy use. A poorly sealed glass door may worsen that loss.

Apply compatible flashing and sealant according to local building requirements. Keep drainage paths open.

Set the frame carefully, then fasten it without crushing the material. Use a long level across the sill. Check both jambs before tightening every screw. Small errors matter.

Hang the active panel and test its movement. Adjust the rollers until the panel glides without scraping. The lock should engage with light pressure, not force. Examine the weather seals for even contact.

National Fenestration Rating Council guidance shows why visible performance ratings matter; compare U-factor and solar heat gain before installation.

Still, a rating cannot correct a twisted frame. I once trusted a perfect-looking wall and skipped one diagonal measurement. That shortcut created a stubborn gap.

Recheck the diagonals, then inspect from outside during daylight. A thin line of light signals unfinished sealing. Clean excess sealant, protect the track, and operate the door repeatedly before final trim.

Seal, Inspect, and Test the Completed Installation

How to Replace a Sliding Glass Door?

Seal, Inspect, and Test the Completed Installation

A replacement door can look perfect and still leak air. The U.S. Department of Energy reports that windows and doors may cause 25–30% of residential heating and cooling energy loss. That makes the perimeter seal more than a finishing detail.

After setting the frame, inspect every corner, fastener, and meeting rail. The sill should remain level, with no visible gaps beneath the threshold. Apply compatible exterior sealant continuously, but leave designed drainage paths open. Do not block weep holes. Inside, use low-expansion foam around the frame, filling the cavity carefully. Too much foam can bow the frame and restrict panel movement.

Test it in real conditions. Slide the panel several times. It should move smoothly without scraping, rocking, or excessive force. Lock the panel and check that the latch engages fully. On a windy day, hold a thin tissue near the joints. Movement can reveal hidden air leakage. The formal ASTM E283 method measures air leakage under controlled pressure, while field guidance from AAMA/FGIA 502 supports checking installed fenestration performance.

I once missed a small gap behind the handle-side trim. It passed a quick visual check. Rain exposed it later. Inspect twice.

Spray water gently across the exterior, never directly upward into the sill. Watch indoors for moisture, then recheck the seal after twenty-four hours. A final review should include drainage, operation, weather sealing, and visible finish quality.

How to Replace a Sliding Glass Door? — Seal, Inspect, and Test the Completed Installation

This quality-control chart summarizes the observable checks to complete after installing a replacement sliding glass door. Each bar represents the number of verification points in that stage.

Confirm a continuous seal, verify that the frame is plumb, level, and square, then test smooth operation, latching, and resistance to water intrusion.